Identification | Extracting Dye | Mordanting | Dyeing Wool, Silk and Cotton | Fresh vs Dry Leaves | Preparing Cotton
Eucalyptus goniocalyx – Long-leaf Box
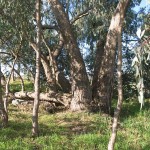
Eucalyptus goniocalyx or Long-leaf Box is a locally occurring eucalyptus species. It has at least one close relative in E. nortonii – Mealy Bundy. Intermediates between the two species are very common.
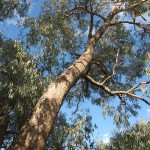
We have one very large Long-leaf Box tree on our property, surrounded by juvenile trees. The young trees appear to radiate out from the trunk of the “parent” tree in lines almost as if they were actually suckering off it roots.
Identification of the tree by it’s spreading habit, trunk, bark, flower buds, seed cases, juvenile and adult leaves would indicate it to be a Long-leaf Box. Quite a high proportion of the leaves are much longer than the 20cm or 25cm referenced in other sites and texts, with some close to 30cm long.
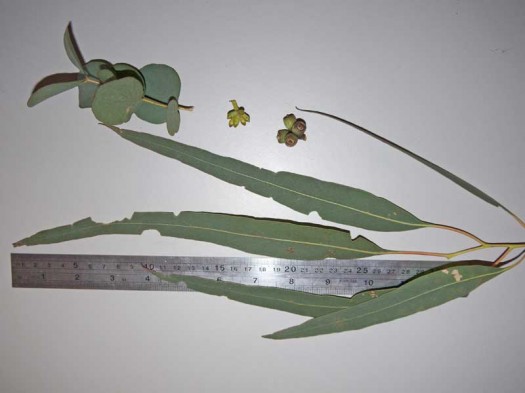
The young trees growing underneath and immediately adjacent to the full sized tree appear to be the same species, or very closely related. No flowering buds or seed capsules are present on the juveniles, yet, to aid in confirming the identification.
First Extraction – SAT / SUN

A bucketful of dry eucalyptus leaves (400g) were collected for this first experiment. They were harvested from one of the suckering / young tree that had been blown down about a month earlier in strong winds.
The leaves were torn and immersed in 8 liters of rainwater in a big stainless steel stockpot and left overnight to soak.
It is interesting and perhaps obvious in hindsight to note that the water used can have an influence on the resulting dye colours. Most books seem to recommend rainwater where possible, as town supplies may be deliberately or inadvertently treated with chemicals that may influence the outcome. For example many councils treat town water supplies with alum to clarify the water, old pipes can rust or break introducing traces of iron or other contaminants, and hot water from old copper systems can introduce small traces of copper.
For similar reasons it is recommended to use stainless steel or enamel pots to both extract the dyes and dye the fibers. Old plastic buckets also make great temporary storage containers.
Even though these are natural dyes, it is recommended that any pots or utensils used in the dyeing process are NOT used for preparing food. Keep your dye containers and tools completely separate!
Next morning, the pot was heated slowly on the gas cook-top to just below simmering over the space of 2 hours. It was kept just below the simmer point for another hour, then turned off and left to cool.
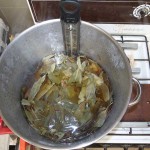
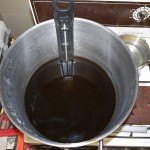
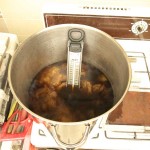
The resulting liquid in the pot was quite a dark brownish colour. The leaves were strained out, and the liquid returned to the pot.
The damp pre-mordanted wool roving was added to the cool dye water as a combination dye pot. That is all four test samples – no mordant, alum, copper and iron mordanted – were put into the one pot at the same time.
Fibres absorb mordants and dyes far better if pre-soaked for at least 5 minutes prior to mordanting or dyeing. Excess water can be drained, squeezed or toweled out lightly depending on the fibre – cotton, silk, wool etc. The important thing is that the fiber should be thoroughly damp for even penetration of dye or mordant. Throughout all my dyeing experiments written about here the fabric or fibers were pre-soaked in rainwater before treating or dyeing.
Pre-mordanting wool roving – SAT
Another aspect of dyeing with natural dyes that has many variations is whether or not to mordant, what to mordant with and whether to pre-mordant, post-mordant or mordant at the same time as dye (meta-mordant).
Mordants are substances used to fix natural dyes to natural fibers – protein or animal based like wool and silk, and cellulose or plant based like cotton. Mordants can also affect the resulting colour the fibre will take from the natural dye.
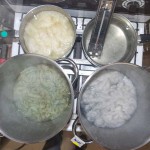
For the purpose of these tests I used three mordants I had easy access to to treat my merino roving – copper (copper sulphate), iron (ferrous sulphate) and alum (potassium alum). NOTE: Mordants can be poisonous – please refer to Mordant Safety and Disposal below.
In the accompanying photo top left – iron; bottom left – copper; bottom right – alum, with roving steaming on the stove.
Following the recommendations in the reference texts used the mordant was applied to the roving prior to the dye bath – pre-mordanting. Measurements are adjusted for the 30g (1oz) of merino roving to be used in each test. The roving was pre-soaked for at least 5 mins in rainwater prior to mordanting.
Alum (Please read Mordant Safety and Disposal below)
Dissolve 1½ teaspoons alum and ½ teaspoon cream of tartar in a small amount (1 cup) of hot rainwater in the mordanting pot. Add the remaining rainwater (3 cups) to make a total of 1 litre of water. Add the pre-soaked wool. Heat slowly until steam rises, and keep just below simmering for one hour.
At the end of the hour allow to cool in the pot. I left mine overnight numerous times with no obvious ill effects.
When cool, the wool can be removed and wrapped in a towel to dry. Do not rinse and do not squeeze dry. The towel works brilliantly to remove excess moisture.
Copper (Please read Mordant Safety and Disposal below)
Dissolve ½ teaspoon of copper sulphate in a small amount (1 cup) of hot rainwater in the mordanting pot. Add the remaining rainwater (3 cups) to make a total of 1 litre of water. Add the pre-soaked wool. Heat slowly until steam rises, and keep just below simmering for one hour.
At the end of the hour allow to cool in the pot. Some texts recommend removing the wool immediately, others recommend leaving it in the pot overnight. In order to avoid felting the wool with our chilly winter air I opted to leave it in the pot to cool.
Again, when cool, the wool can be removed and wrapped in a towel to dry. Do not rinse and do not squeeze dry.
Iron (Please read Mordant Safety and Disposal below)
Dissolve 1/8 teaspoon of ferrous sulphate and ½ teaspoon cream of tartar in a small amount (1 cup) of hot rainwater in the mordanting pot. Add the remaining rainwater (3 cups) to make a total of 1 litre of water. Add the pre-soaked wool. Heat slowly until steam rises, and keep just below simmering for 15 minutes.
At the end of the allotted time this gets tricky if you’re mordanting wool roving and DON’T want it to felt.
Iron can damage or harden the fiber if too much is used or the fibre is exposed to it for too long. Reference texts recommend removing the wool immediately and rinsing it thoroughly.
I know from experience that with our ambient winter temperatures of 10-15°C the wool will felt immediately on contact with the air.
For my first test I also heated some plain rainwater in a separate pot. At the 15 minute mark the heat was turned off both pots, and the hot water was added to the iron mordant pot to dilute the solution. It was then left in the pot to completely cool before rinsing and wrapping in a towel. This worked fine in that the wool did not felt at all. Whether the prolonged exposure to the diluted solution damaged the fiber remains to be seen. No obvious hardening or deterioration of any sort has been noticed in this sample to date.
In a subsequent session, cold ambient temperature rainwater was added slowly to dilute the hot iron solution and cool the wool, which was then rinsed in rainwater as soon as possible – and the wool felted significantly.
No mordant
As a “control” and to see what happens without any mordant, one sample was not pre-treated with any mordant at all.
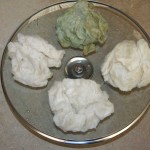
In the photograph – pre-mordanted and soaked roving ready for the dye pot: top – copper; right – iron; bottom – no mordant; left – alum.
Alternatives to chemical mordants?
Copper, aluminium or iron pots can be used instead of mordanting with these chemicals, as can old nails, copper coins, wire and other pieces of junk. I have used an old, cheap iron wok with onion skins to alter fabric colours from natural dyes. Using measured chemical powders however is more reliable and allows for more control with better results.
Mordant Safety and Disposal
Treat mordants as you would any potentially caustic substance – with due care. Avoid breathing the powder dust by using a face mask, don’t inhale steaming vapors, only use in a well ventilated area and wear gloves when handling mordants or un-rinsed mordanted fibers. Handled sensibly, these mordants should not cause any problems. However some people can be sensitive to even small exposures, so using precautions are strongly recommended.
If you suspect any reactions to any mordants discontinue using them immediately. Eucalyptus can produce beautiful dye colours even without the use of mordants.
Alum is generally considered mostly harmless. It is used extensively to treat domestic water supplies. Handle with care to avoid any skin sensitivities and use gloves when handling freshly mordanted fibres or fabric for the same reason.
Copper sulphate is poisonous so keep it out of reach of animals and young children. Use a mask to avoid inhaling any dust and use gloves when handling the powder and freshly mordanted fibres or fabric. Having said that, you would probably absorb more copper from a copper bracelet commonly used to “treat” RSI and arthritis. And as a teenager I used to grow beautiful copper sulphate crystals from super saturated solutions with no ill effects … and that was a long time ago.
Ferrous sulphate (iron) is also poisonous, so be sensible and handle it with the same precautions.
Once dyed and rinsed the only noticeable lingering smell in the fibers is a slight but pleasant eucalyptus scent, which dissipates over time and airing.
Disposal: The small amounts of chemicals used at the dilutions recommended are apparently considered safe to dispose of down the drain. I prefer to dispose of my spent mordant solutions onto my weeds (of which I have plenty). To date, I have not been successful in killing or even stunting weed growth with mordants or left over dyes. I live in hope …
Unused powdered mordants should be kept locked away from animals and small children as you would any potentially dangerous household or garden chemical.
First Extraction Dyeing Results – SUN / MON
The mordanted wool roving was added to the dye pot which was heated slowly over the space of half an hour to just below simmering. Long and slow heating with gentle steaming rising from the dye pot is recommended rather than simmering or boiling. Boiling will most likely felt wool and is discouraged.
The pot was kept at the point just below simmering for an additional 30 minutes, then the heat was turned off and the wool left in the dye solution overnight to cool.
The following morning the wool was removed from the dye pot, rinsed and wrapped in a towel to dry. The samples did not require a lot of rinsing and the only colour that came out in the water during rinsing was a golden yellow. The results from the one dye solution on the differently treated samples, all out of the same dye pot at the same time, was quite dramatic:

Identification of mordants and fiber samples
Throughout the process it is important to keep records of what works, what doesn’t work, and what results are obtained. In order to identify throughout the process which mordant was used on which sample, a simple system of knots in string was used. Alum samples were tied or threaded together with a piece of string with one knot in the end. Copper was identified with 2 knots, iron had no knots in it’s string, and the un-mordanted sample was not tied at all.
2nd Extraction and Exhaust Dyeing – TUE / WED
The eucalyptus leaves used in the first extraction were immersed in 6 liters of rainwater and set aside in a plastic bucket for two more days. The dye from the original dye pot was also kept and set aside.
On the Tuesday morning the leaves were re-simmered using the same method used for the first extraction, and left to cool overnight.
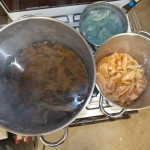
Adding cotton and silk samples to the tests
While the leaves were simmering, small samples of cotton and silk were prepared for dyeing.
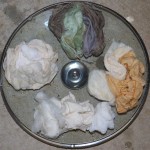
Cotton benefits from the addition of soda, normally washing soda, to help it take up colour. Jean Carman’s “Dyemaking with Eucalypts” includes a recipe that adds soda to the alum when mordanting. While this worked fine with alum, applying the same method to copper and iron had bizarre results with discolouration of the mordant and a tendency to separate out of solution. Pre-soaking the cotton in soda before mordanting, which I used in subsequent tests and document below, worked far better.
The First Extraction tests only used half of the pre-mordanted wool so the remaining half that was still un-dyed and wrapped in towels was available for this second round of experiments. Just to satisfy my own curiosity I also added samples of the pre-dyed wool for an over-dye experiment.
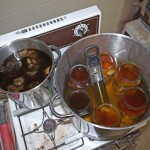
The pre-used dye solution was poured into one pot, with the damp pre-mordanted and appropriately identified wool, cotton and silk. Plus of course the pre-soaked un-mordanted control samples, and four small pieces of the roving from the 1st extraction to over-dye. This was an exhaust dye test to see how much if any colour was still available in the used dye solution.
The fresh 2nd extraction dye from the old leaves was not as dark as the 1st extraction but still had good colour. It was poured over the samples in separate jars separated by mordant to test for any differences from combo dyeing. The two smaller jars to the left of the thermometer in the photo were the over-dye experiments of already dyed wool – alum and no mordant together in one jar, and iron and copper together in the other darker jar.
The pot was filled with additional water up to the level of dye in the jars to assist in the even and gradual heating of the dye-jars.
Both pots were heated gradually over about an hour, and allowed to steam just below simmering. At the 15 minute mark the combo exhaust dye pot was turned off. Then at the 30 minute mark the heat was turned off the 2nd extraction jar pot. Both pots were allowed to naturally cool.
Next morning the samples were rinsed, toweled and dried.
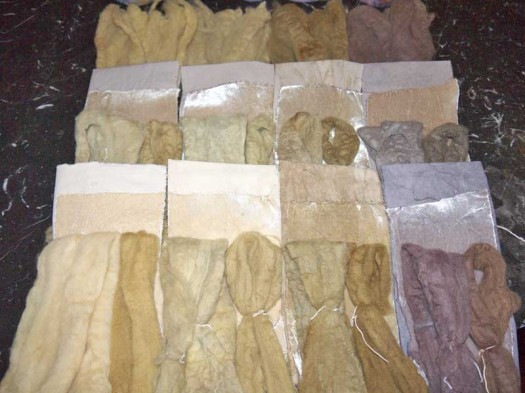
From left to right: no mordant (fawn/gold); alum (light olive); copper (dark olive/brown); iron (brown).
The rows from top to bottom:
1st extraction wool;
Combo pot exhaust dye cotton;
Combo pot exhaust dye silk velvet;
Combo pot exhaust dye newly-dyed and over-dyed wool;
Separate jars 2nd extraction cotton;
Separate jars 2nd extraction silk velvet;
Separate jars 2nd extraction newly-dyed and over-dyed wool.
Conclusions:
A combo pot has it’s place – it’s exciting to see different colours emerge from the same dye pot. But separate dye pots results in brighter and fresher looking colours from each of the mordants. Over-dyeing produces deeper colours even without re-mordanting and is definitely worth keeping in mind.
So, whats next?
Fresh leaves vs dry leaves
Applying the best techniques for my workflow determined by trial and error over the first 2 rounds of dye tests, this last double dye round went far more smoothly.
Late Friday afternoon, 200g of dried leaves were collected from the fallen tree as well as 200g of fresh leaves from the lower branches of the parent tree. Both were immersed in 4 liters of rainwater in separate plastic buckets and left overnight.
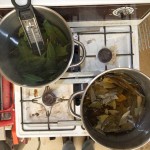
On Saturday morning each bucket was dumped into it’s own pot and set to slowly come up to steam simmer over 2 hours, then kept steaming just below simmering for another hour, after which they were both turned off and left to cool overnight.
The dry leaves released a lot of colour into the water in the bucket overnight, and even more when steam simmered. The fresh leaves released very little if any colour into the water bucket, but released a reasonable amount after about an hour and a half of warming. The dry leaves, weight for weight, released far more colour into the water than the fresh leaves.
Getting the cotton ready for mordanting
While the leaves were steaming, the 160g of cotton was pre-prepared by soaking it for 20 minutes in 6 litres of warm rain water that had approx. 2⅔ teaspoons of washing soda stirred through. At the end of the 20 minutes the excess water was squeezed out and the cotton set aside in a plastic bucket. These quantities were based on the original cotton preparation instructions from Jean Carman’s text but without the alum. Many other on-line resources recommend ½ cup of soda or more per 4 litres of water for pre-treatment. I found the cotton was slimy (alkaline) enough with the smaller quantity of soda after the soak and I’m all in favor of less chemicals rather than more. Your experiences may vary.
Mordanting all samples
On Saturday afternoon the silk and wool roving samples were prepared and tagged (knots in cotton string as before). The alum mordanting was done so it could sit overnight. The silk and wool samples were mordanted in one pot using the same procedures outlined above in Pre-mordanting Wool Roving. The cotton, having already been pre-treated with soda, was mordanted with exactly the same process as the silk and wool, but in a separate pot. This time the mordant did not discolour or particulate out.
Early on Sunday morning the copper mordanting was done, silk and wool separate to cotton as above, and same procedure as used in Pre-mordanting Wool Roving. It was left to cool in the pot until afternoon. The iron mordanting was done mid afternoon, just before the dye session, using a separate pot again for the cotton. The silk and wool pot was very slowly diluted with cold water, however the wool still started to felt. In future I think I’d prefer to prepare the iron modant earlier, dilute it with hot water and leave it to cool in the pot when using wool roving in cold weather.
The dyeing process
All tagged samples were placed in jars – two jars for each mordant variation – wool and silk together, cotton on it’s own – and two complete sets of jars – one for fresh leaves and one for dry.
Each set was placed in it’s own labelled pot, and the extracted cold dye water poured into the jars. Again the pot was filled with water to the level of dye in the jars, and slowly heated over half an hour or so. This time the pots were left to steam simmer for about 45 minutes before being turned off and left to cool overnight.
Results
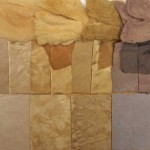
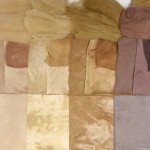
Both photos:
Left to right: no mordant; alum; copper; iron.
Top row: merino wool roving;
Middle row: raw silk, silk satin, silk organza strip;
Bottom row: cotton.
Click on the images for an enlarged view.
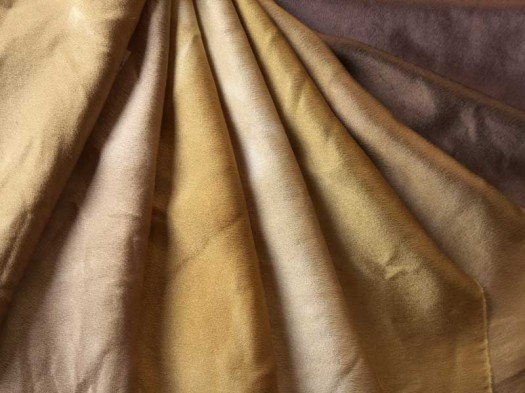
The cotton was deliberately scrunched into the smallest jars to encourage the mottled effect. While brilliant with the alum and copper mordanted samples, it was more subtle with the iron and un-mordanted samples. The effects on the silk organza were amazing, with the iron mordanted samples coming out dark brown to almost black! The rest in metallic bronze and golds.
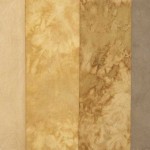
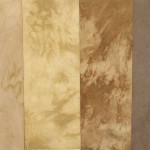
Photos:
Left to right: no mordant; alum; copper; iron.
Click on the images for an enlarged view.
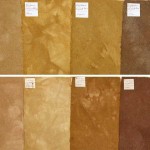
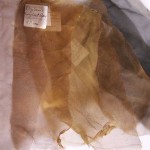
Combined results
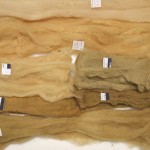
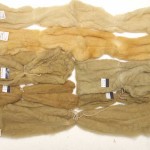
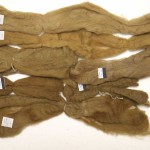
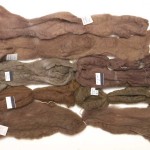
Merino wool roving was used in all these tests. The last set of images shows some of the range of colours available from Eucalyptus goniocalyx, fresh and dry, on wool roving using no mordant, alum, copper and iron mordants and a variety of dyeing processes. All pieces are arranged as laid out in the labeled key.

Conclusions
Eucalyptus are effective natural dyes, giving a range of colours and shades when used both by themselves and when treated with appropriate mordants.
Over-dyeing works extremely well, and the possible combinations for combining mordants and over-dyeing are only limited by your time, imagination and materials to hand.
Preparing and dyeing with eucalyptus smells wonderfully of fresh eucalyptus oil – even from dry leaves. Lifting the lid and catching the vapors from a pot of steeped and simmered leaves left to cool really clears the airways.
The only drawback, if you consider it a drawback, would be repeatability of colour over the long term. Leaves from a drought stressed tree can give different colour to the same tree during a wet spell. Apparently even which side of the tree the leaves come from can influence the results. As can the age of the growth, how long it’s been dried if at all, whether or not it hosts parasites on the leaves, or mould etc. Then there’s the quality and nature of the water used, and the mordants.
It is quite probable that within a range of colour results, which does vary from species to species, each dyed piece will be unique and individual, like the tree it comes from.
