I just love working with English Leicester fleece – it takes dye fabulously, has a luster to dye for and the curls are just so damn gorgeous. And for a bonus, the raw fleece is nowhere near as dirty as my alpacas.
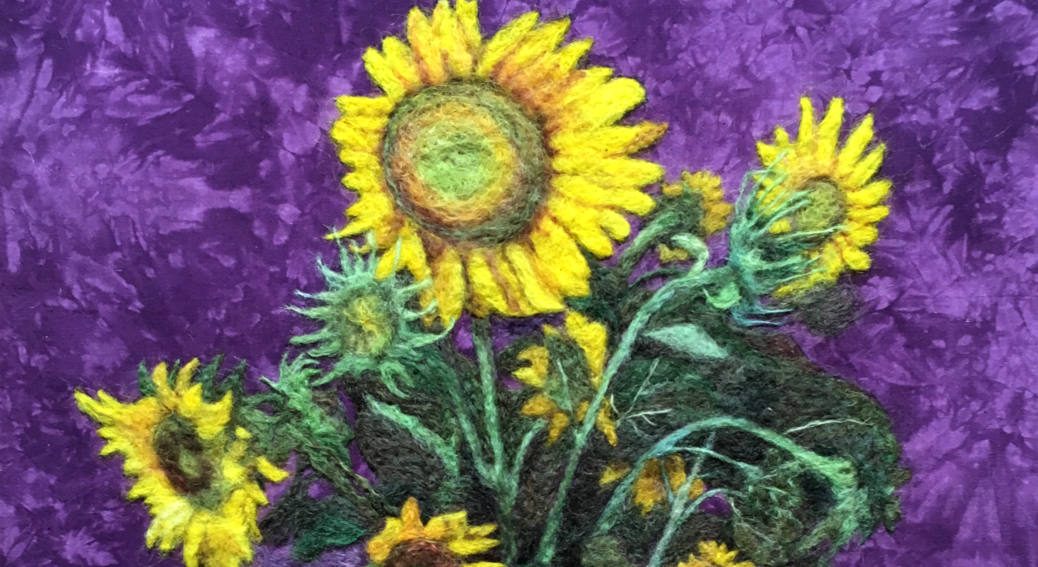
English Leicester needle felts well too, and imparts an oil paint like richness and shine, especially with wool paintings. The featured image with this post – “Sunflowers” – is needle felted EL on hand dyed cotton.

Taking a raw fleece and preparing it for dying is part of the process here at the farm. Our small flock of 14 English Leicesters are all shorn late spring/early summer, before the weather gets too hot. Then the task is to wash, scour and dry the fleeces over summer ready for carding or plonking those lovely locks straight into the dye pot.
In this post we’ll follow the process of getting from:
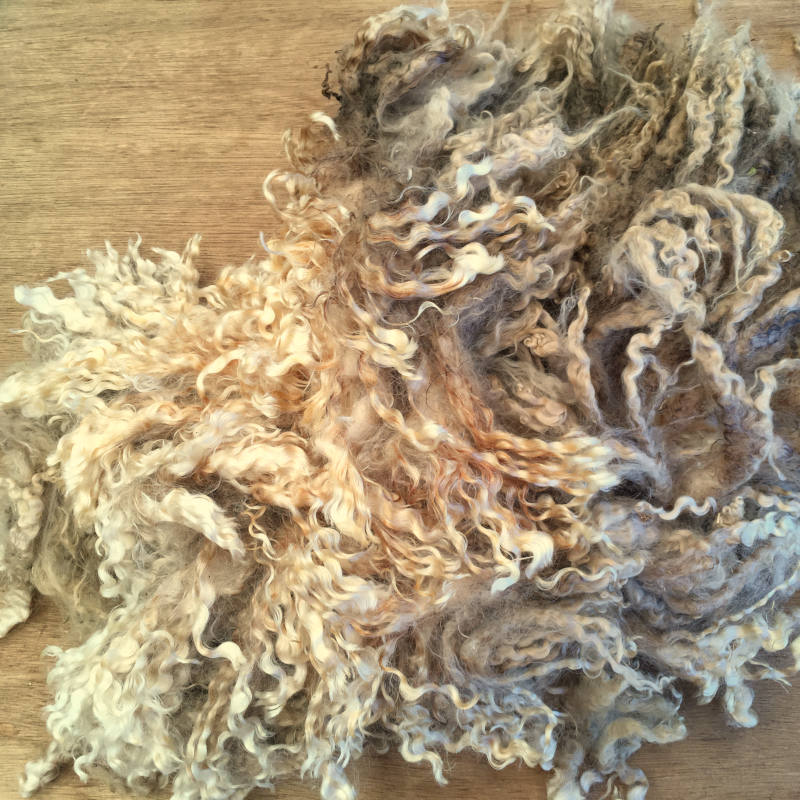
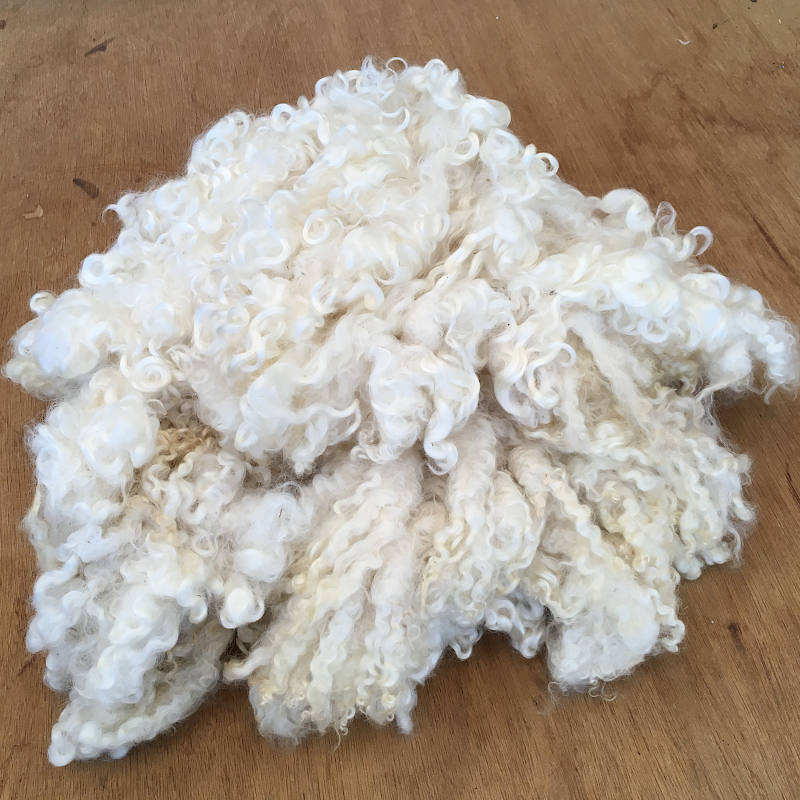
The above photos are a before and after of the same generous handful of fleece.
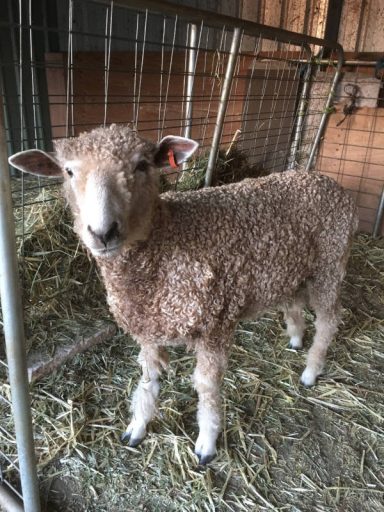
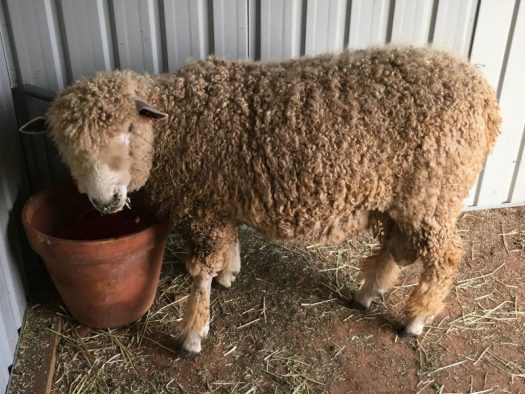
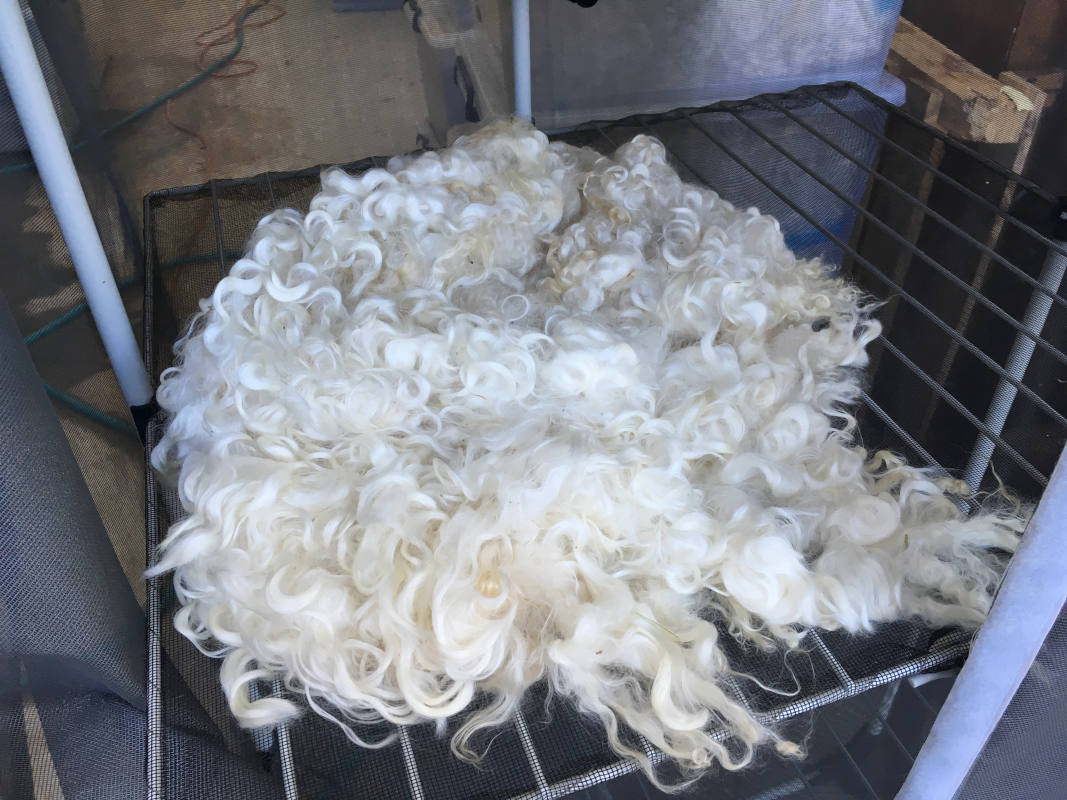
But first a little about the contributor of the fleece used for the following process – our youngest ram, V2.
This is V2’s first shorn fleece.
Just over 12 months of growth.
He had always carried lovely tight, shiny curls. As far as the breed goes, his fleece was criticised by a Show judge as being too “feminine”. But I’ve always loved it!
Side story …
In December 2019, seven weeks after shearing, V2 was bitten by an Eastern Brown snake. We thought we’d lose him. The estimate from the vet for anti-venom was three times what it would cost to replace him with a new, unrelated ram; or would buy hay for our 57 alpacas, 15 sheep (and 1 goat) for a couple of months. After 5 years of worsening drought and no pasture re-growth the hay won. But we weren’t going to give up on V2, and he’s a fighter. There are a number of controversial alternative treatments for snakebite in livestock and we used all we could find. Something worked.
By the following day, while still being mostly blind – a common side effect of the bite reaction – he had stopped convulsing and stumbling in circles. He was responding to voices, and his appetite returned. Improvement was slow, but steady. It took a few weeks for his sight to return to normal and for us to consider he was well enough to discontinue treatment.
Now, three months later, he has fully recovered, put on a lot of condition, and is busy growing another curly fleece. Given we’ve got no pasture back yet it’ll probably be another dirty one …
The Process – Pre-soak
From dirty-as to clean
The first step was to pull out a good double handful of fleece, and remove as much poop, hay, seeds, second cuts and matted bits as possible. A vigorous shake over the sorting table helped a lot of loose material drop out.
Being a first fleece, or lamb fleece, the tips were a bit dry but the lock held up well to the fragile fleece test – a good sharp pull between the fingers – so I didn’t cut the tips off, which I had with the previous lambs fleece which was just too matted at the tips.

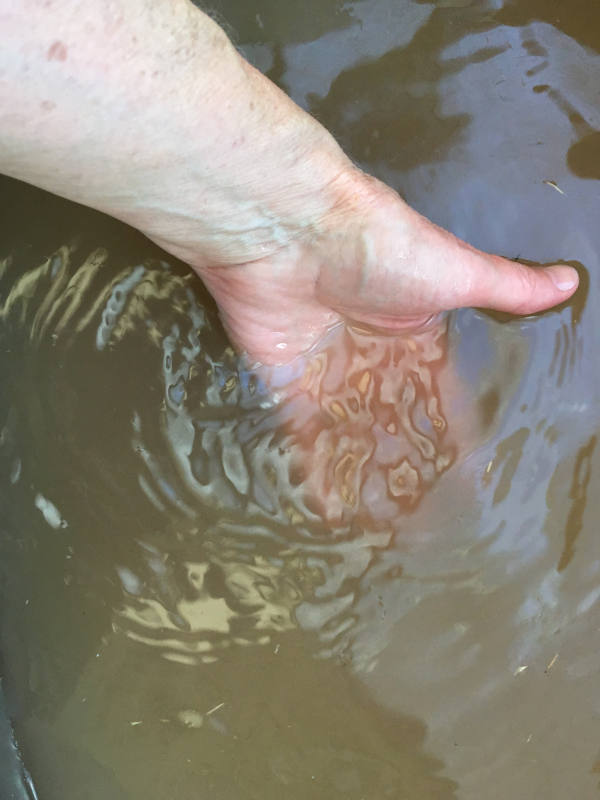
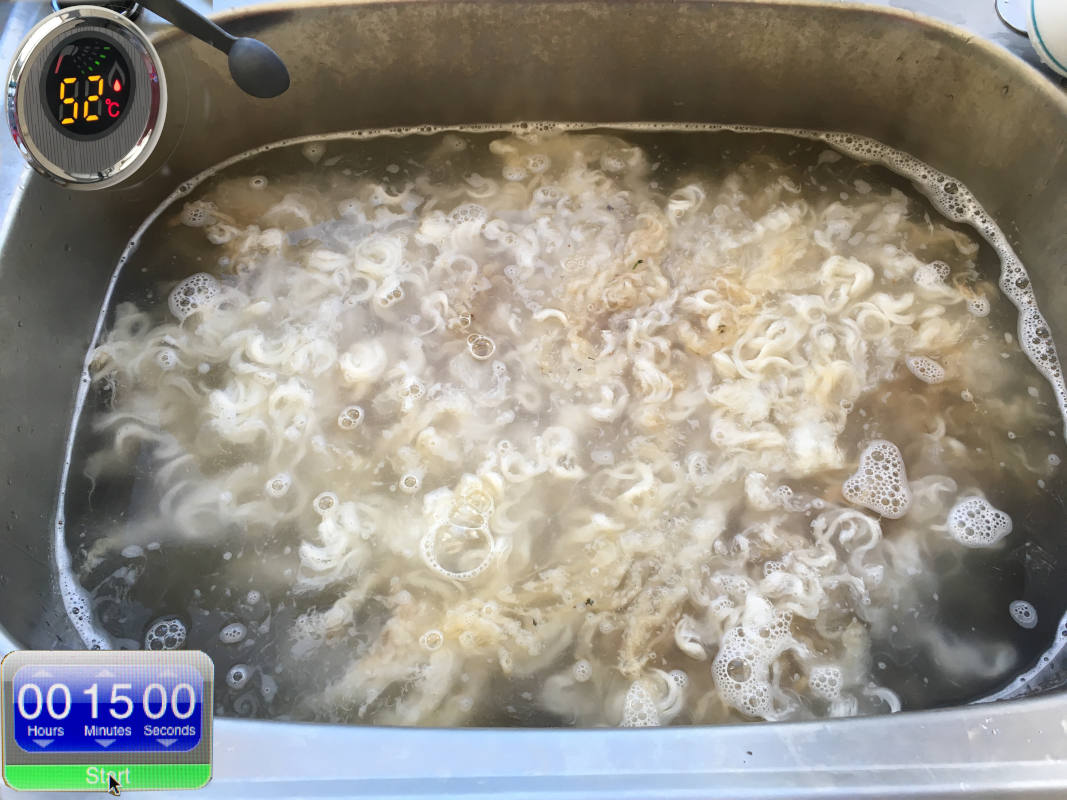
Filling a laundry tub half way with hot water, the dry fleece was gently placed on top. The hot water seemed to suck it under, only needing a slight push with the handle of a plastic potato masher to ensure the whole fleece was evenly wet. The biggest trick to washing a dirty fleece – and boy was this fleece DIRTY! – is to make sure it has plenty of room to move and spread out. A high water to fleece ratio.
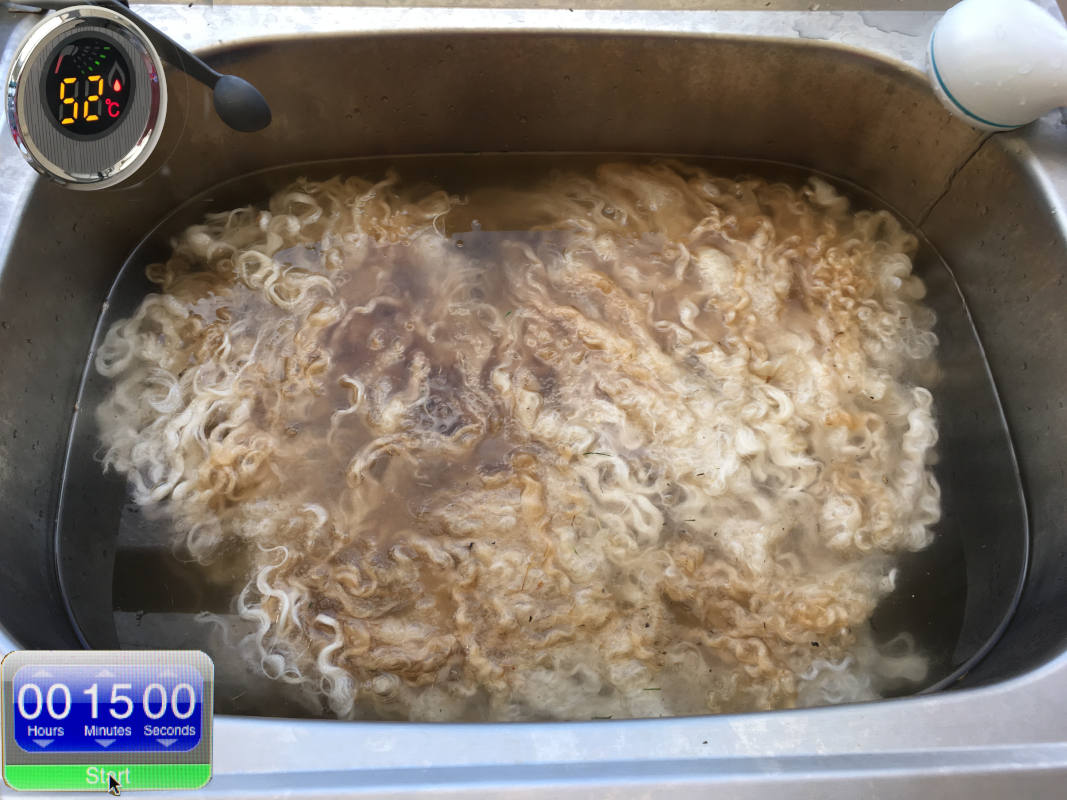
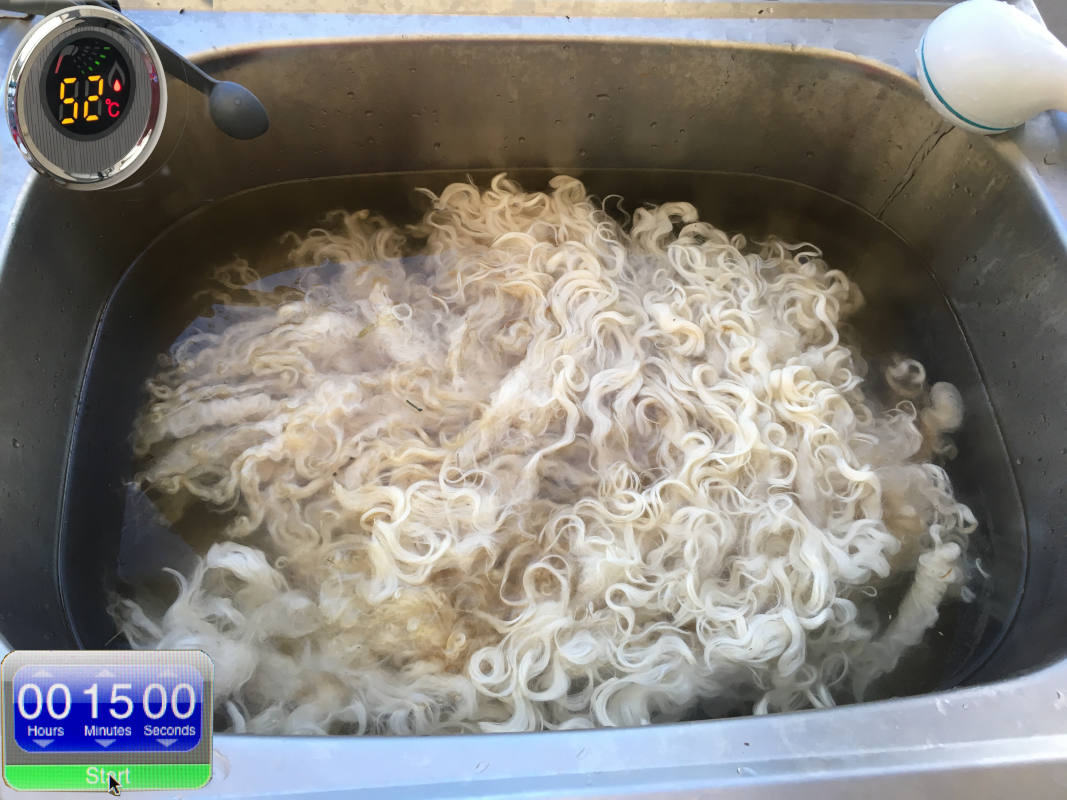
The recommended soak/scour time is between 15 – 20 minutes per bath. By the time I get the fleece settled, and allowing for the inevitable delay re-filling the tub with clean water, a 15 minute timer gives me warning it’s time for the next step. In order to reduce temperature shock, I lie a bucket down in the tub and slide the fleece into it with a generous amount of tub water, and set it aside in an insulated foam crate while the remaining dirty water in the tub is drained and clean water, also at around 52C, is added. So the full time the fleece has for each step is probably much closer to 20 mins or a bit more (like when the gas bottle suddenly runs out …). During those 15 minute intervals I can start cleaning another handful of fleece, or do some needle felting, feed the cat … the claxton on the alarm is quite good 🙂
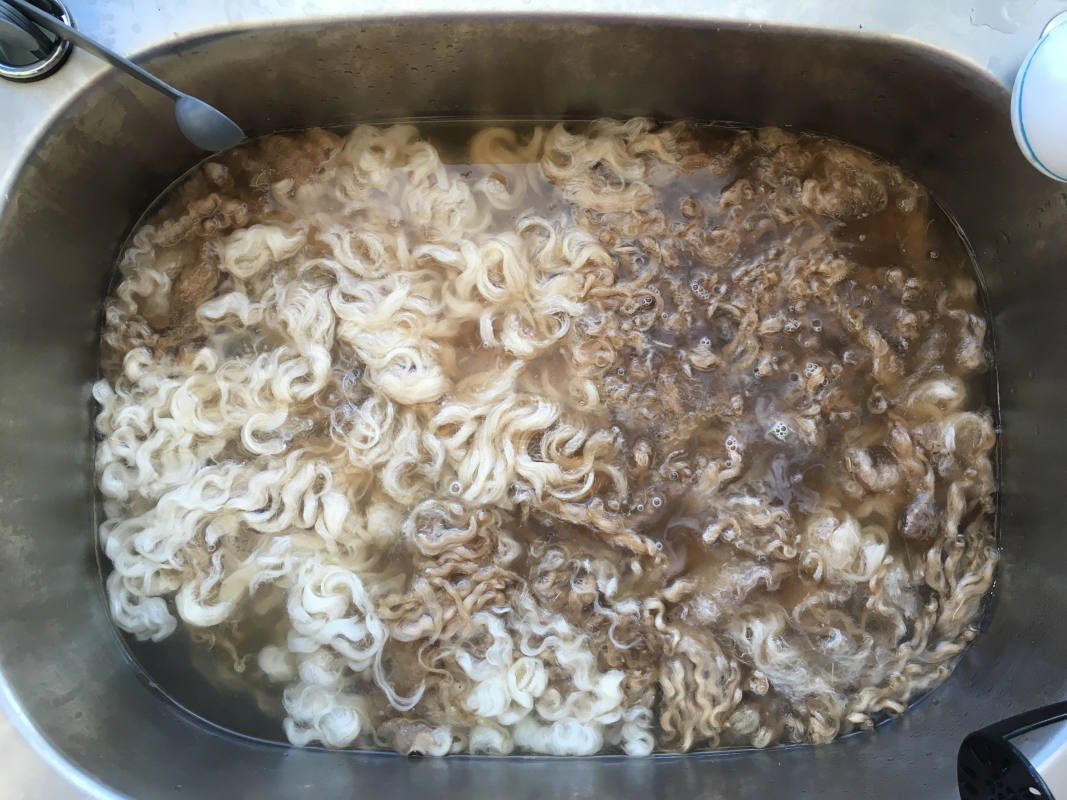
The first soak water however I could just about use as top soil!
Did I say this boy had a dirty fleece? Some EL fleeces only need one pre-soak. Most need two. This fleece really needed 3 hot water pre-soaks to get the dirt out before scouring could begin.
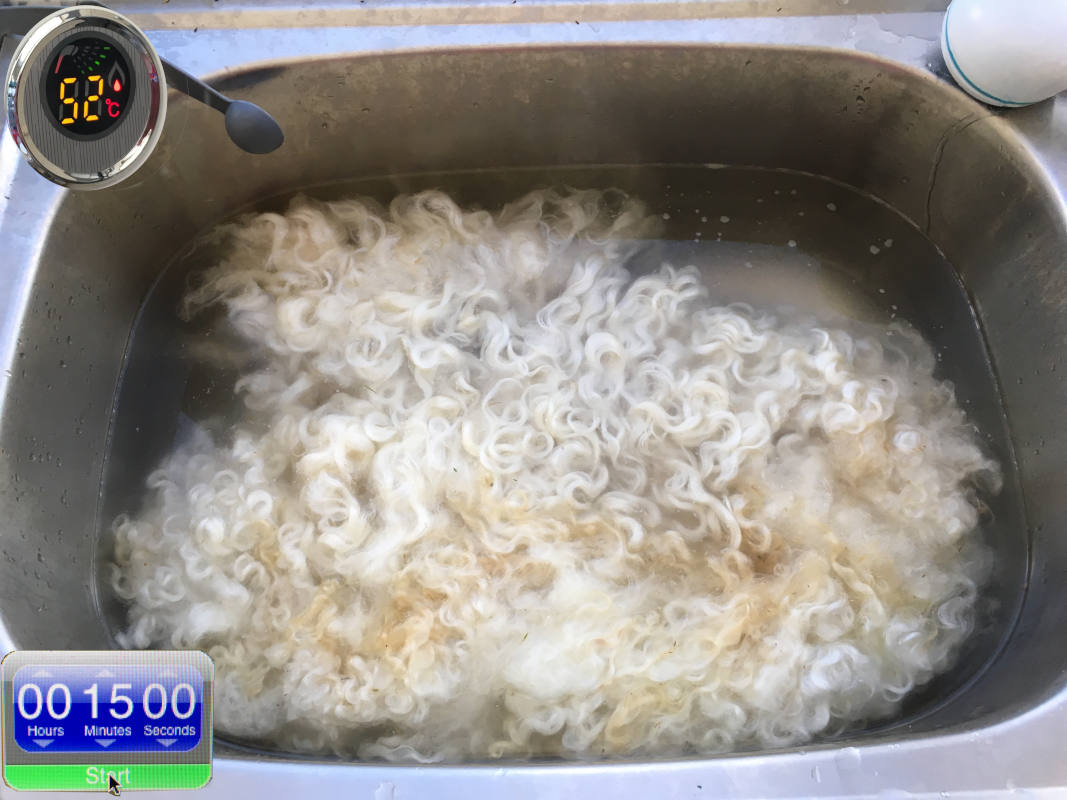
When the tub is half full of water and ready for the next soak, I lift the fleece out of the bucket, squeeze it gently to remove some old soak water, and place it gently back in the tub. If there are any obviously stubborn dirty tips I’ll rub them between my fingers to open them up to dislodge the dirt. The locks usually re-form on drying.
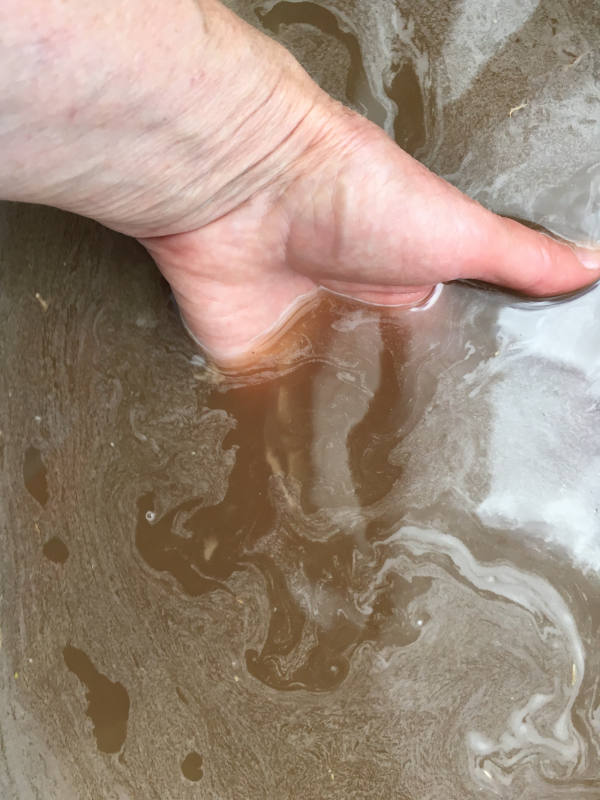
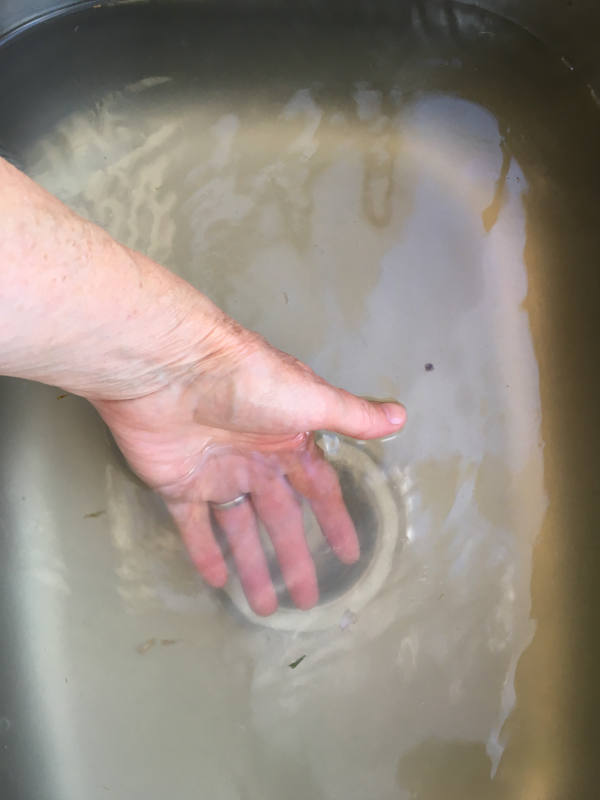
After the 15 mins the soak water remaining is a lot better – I can almost see my fingers!
Now the fleece is ready to scour to remove the lanolin.
Scouring the lanolin out
Not as scary as it sounds …
During the sorting and pre-soak baths, handling EL fleece always leaves a slight greasy feel on my hands. I really hate wearing rubber gloves as my hands sweat resulting in a painful redness around my fingernails. Neither our sheep (nor alpacas) are treated with nasty chemicals and I don’t mind the feel or smell of lanolin so I always use bare hands. Unlike gardening, handling fleece does not dry my hands out, although they do get washed a lot!
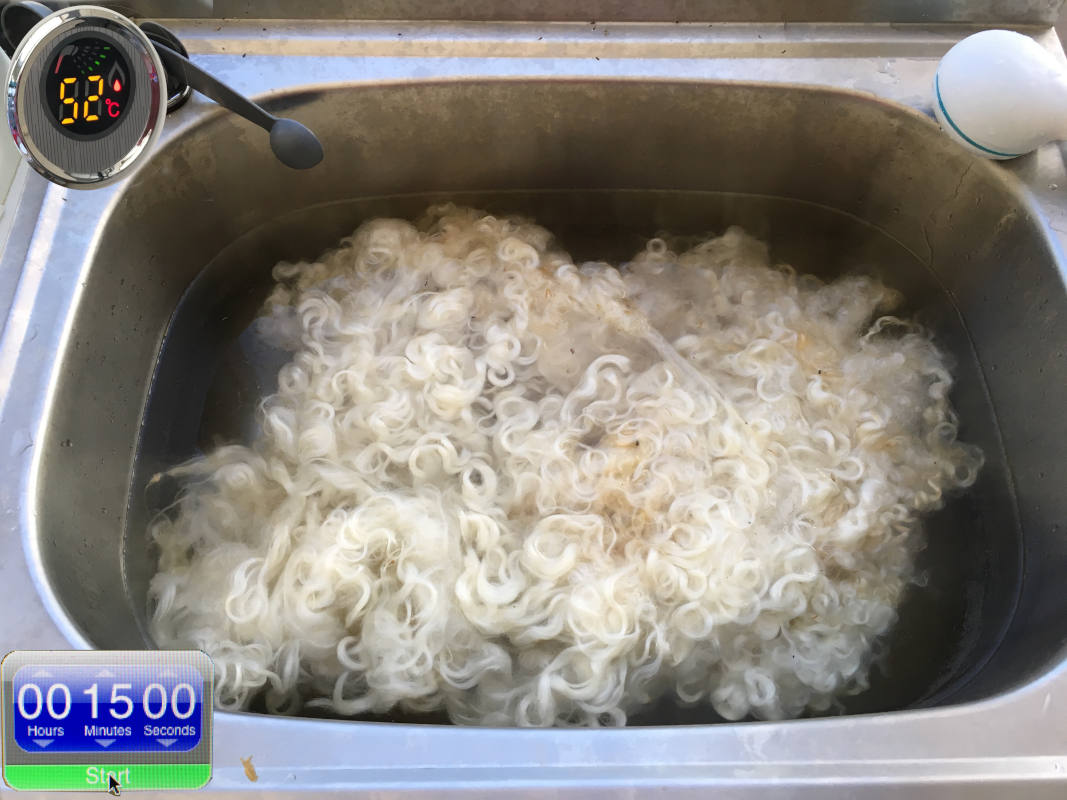
Removing the lanolin from greasy fleece is as easy as the pre-soak baths. Removing the fleece from the last pre-soak into the bucket as usual, drain and re-fill the tub to the usual temperature. Then I add the required amount of Power Scour to the water and gently swirl it around. Don’t add the Power Scour while the tub is filling or some is wasted in foaming.
Then lifting the fleece out of the bucket, gently squeezing some of the excess soak water out and lower it into the tub. I usually move the fleece around gently and open it up to make sure it can all get exposed to the Power Scour.
At the same time carefully removing any VM that becomes obvious.
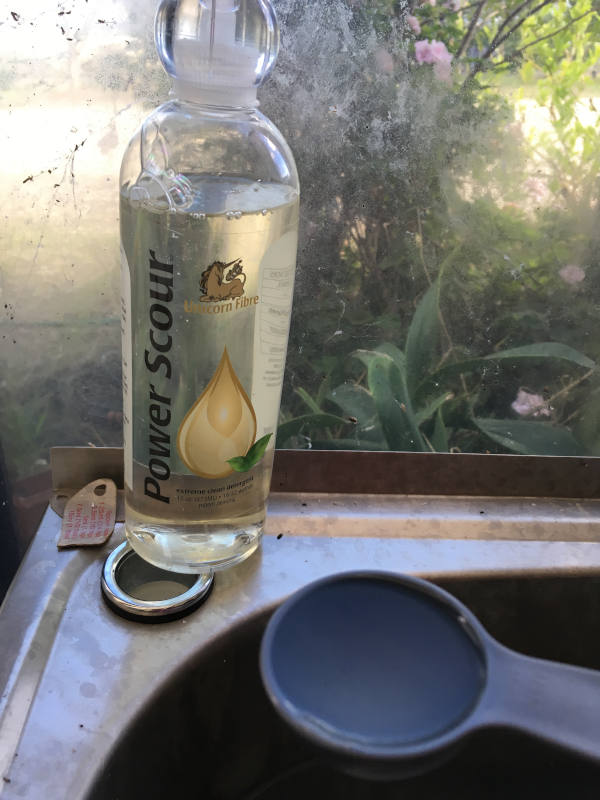
Two tablespoons with this amount of fleece, and gently move it around so as much of the fleece as possible gets exposed to the soapy goodness.
After the time is up (15 minutes as usual + sit time while the tub water is replaced) its time for the rinse baths. Like the pre-soak I just use plain clean water at the same 52C temp, using the same bucket transfer technique.
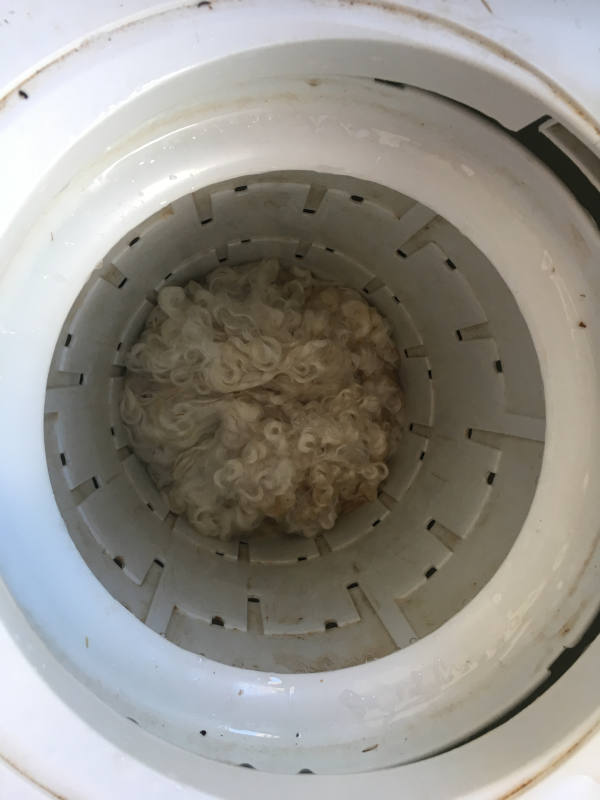
When the last rinse is finished, I lift the fleece from the tub of water into the spin bowl of my twin-tub. Spin it for about a minute, then out and onto the drying rack to dry.
There are still a few off-coloured tips remaining, but they seem to take dye just as well if not better than the rest of the fleece so do not concern me. If I needed to they could simply be snipped off.