All posts by KathyW

Web author, programmer and developer; photographer; designer; artist and bird breeder. Interested in all of the above plus underground homes, alternative energy systems, native plants and animals, alpacas, carnivorous plants, dyers plants and organic gardening.

Panoramas at 200mm

The Beechworth Celtic Festival last year was a painful reminder that carrying a heavy camera and lenses around all day was just not getting any easier! So this year I did what I’d been contemplating for some time and replaced my heavy and ageing Nikon D70 with a new micro-four-thirds camera – a Panasonic Lumix G10. To my delight and amazement not only was the camera half the weight of the D70 (even when fitted with a Belomo/Peleng Fisheye), it is twice the resolution, even though it has a smaller sensor!

I knew my collection of Nikon lenses were not going to be of use with the Panasonic G10, so I purchased a package with the 45mm-200mm lens and the standard 14mm-42mm. I knew I was going to miss my Nikkor 16mm, so I lashed out and bought a Belomo (formerly Peleng) 8mm fisheye lens for the G10 as well.

Snow on Bogong as viewed from Albury

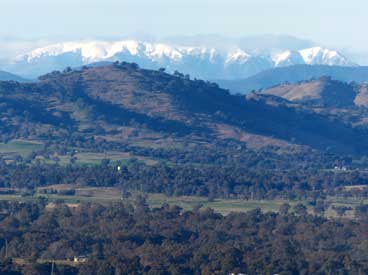
On the 21st of July this year a photo opportunity I’d been watching for appeared briefly. From my studio there is a panoramic view out to the Hume Weir and mountains to the east, south and west. I’d been waiting for one of those cold, clear days when the snow on Mt Bogong became visible. This winter that view has all too often been obscured by clouds and/or rain. For an hour or so one Thursday morning the clouds, mist and haze cleared enough to get a reasonable view to the mountains.

This was the first test for the 45-200mm zoom lens, and it leaves a few things to be desired. At the same time, it was also quite a surprise, so a bitter-sweet experience. The first thing I noticed, which came as no great surprise, was that at full zoom – 200mm – it took ten shots to get what the 14-42mm lens @ 14mm could take in a single shot!

Unfortunately by the time I’d pulled all the images off the camera, converted them from the RAW format, checked them and tried a test stitch of the ten images, the clouds had closed back in over the tops of the mountains and the opportunity of a re-shoot was gone. I had seriously miscalculated the overlap on the first 3 images (lined up on the wrong trees) and there was quite a noticeable light fall-off (or vignetting) at the sides of the images.

200mm panorama from 10 images - bad vignetting obvious.
200mm panorama from 10 images - bad vignetting obvious. Click to enlarge.


It was the light fall-off that was going to cause the biggest headache. Initially it looked like it was going to require a re-shoot with almost a 50% image overlap! Fortunately as it turns out the weather did not co-operate so other alternatives had to be explored.

Since 2006 I’d been using a great product called PTGui to stitch partial, full and multi-row panoramas. It had continued to work fine for my needs so I’d not upgraded it in years. Researching software correction for vignetting I found my trusty PTGui had that capability – in the current pro version. Well, time and cameras move on, it was high time for an upgrade.

Within a few minutes of downloading and installing the update, loading the existing project file, a few intuitive settings in the HDR/Exposure tab and the fall-off was almost completely corrected! Impressed.

200mm panorama, same image set, vignette and exposure correction with PTGui Pro.
200mm panorama, same image set, vignette and exposure correction with PTGui Pro. Click to enlarge.


I’m still watching for favourable weather to shoot another set, possibly a late afternoon with the sun shining off the weir wall and the snow capped mountains.

Despite the light fall-off issue, I’m pleased with the clarity of the 200mm zoom on the micro-four-thirds sensor. Combined with the extra resolution (4000 x 3000 pixels) it can pick out a great amount of detail at quite a distance. The full frame 2nd image in the set for example, includes the Hume Weir wall.

Hume Weir Wall in the distance.
2nd image, full frame as shot, Hume Weir Wall in the distance. Click for 800x600.


Reduced to 50% and cropped for 800×600 it’s easy to see the wall, the gates, and to the side – the yellow drilling rig and the orange crane.

Hume Weir Wall detail.
Hume Weir Wall detail. Click for 800x600.


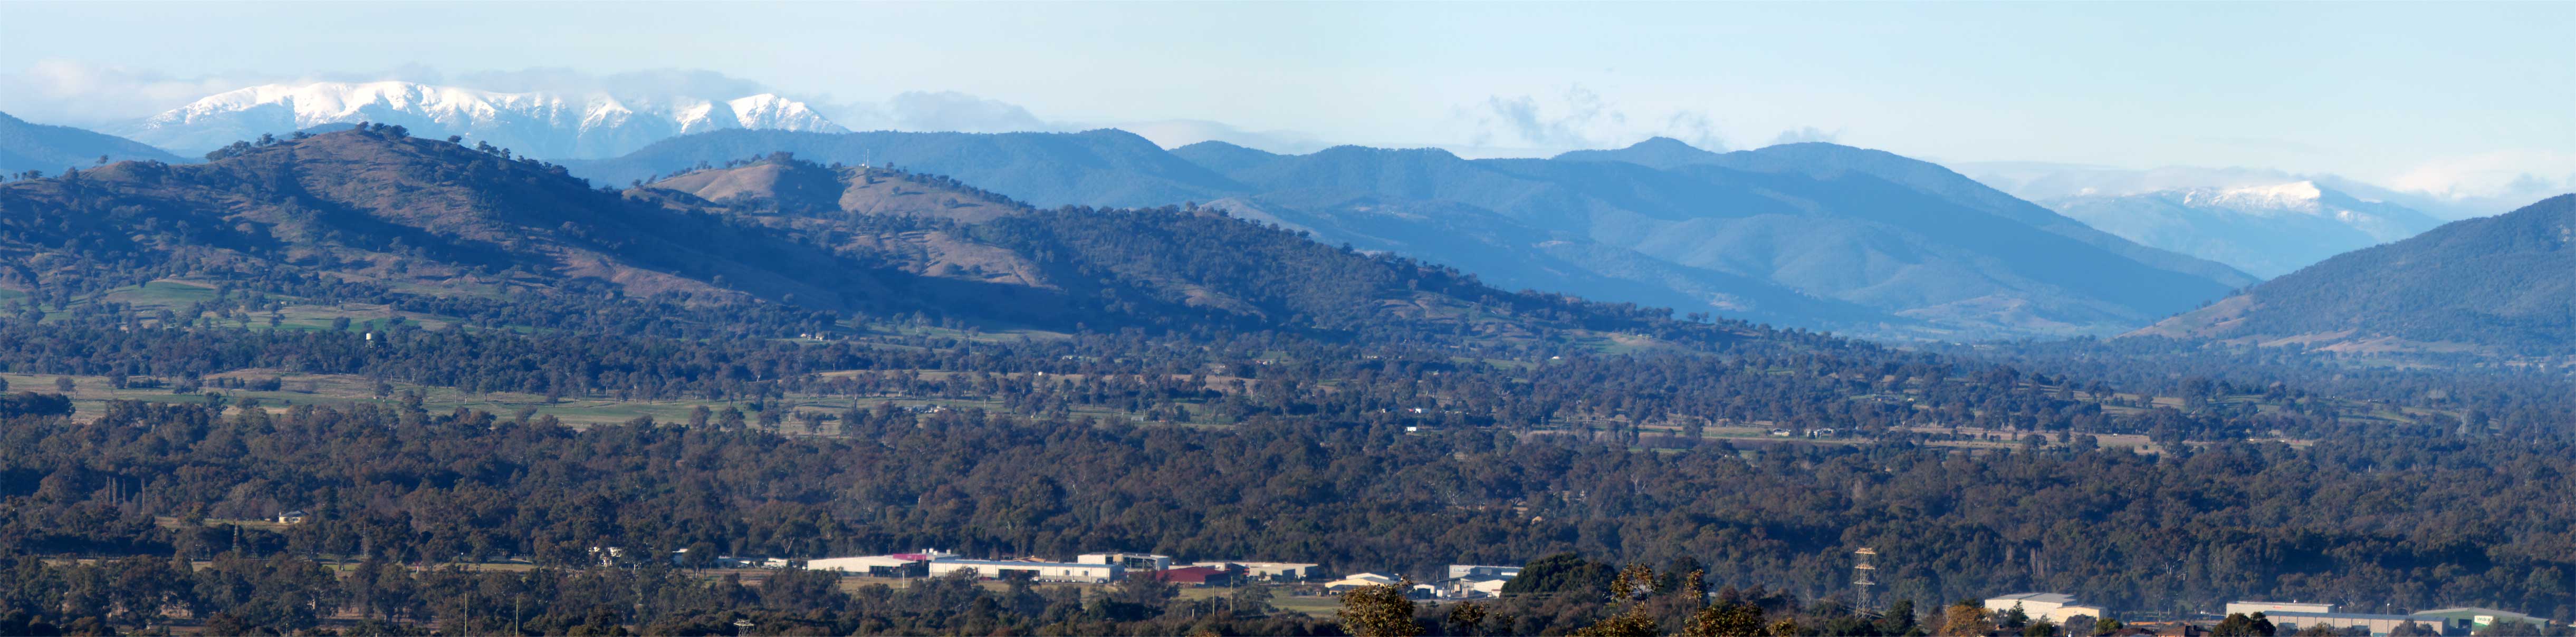
For a more detailed view of the snow, from Bogong to Feathertop, check the pano below (linked to a 1024×253 pixel image). Or for a really detailed version download this image (4483 x 1208 pixels – 426Kb).

Bogong to Feathertop
Bogong to Feathertop. Click for larger version (1024x253).


Dyed Wool Spectrum

This week marks the second week of my Quilt University on-line Wool Dyeing course with Marjie McWilliams.

Week 2 – Lesson 2

Wool Roving SpectrumFirst thing Saturday morning I read through this weeks lesson instructions over a hot cuppa, printed them out and inserted the pages in my Wool Dyeing display book. The plastic sleeve pages are invaluable for situations where water (and dye) is likely to get splashed or dripped around.

Saturday after lunch is the first opportunity I get to start the next lesson.

The notes for the first exercise in Lesson 2 suggested dyeing one colour or multiple colours in separate pots or jars, and gave recipes for making eight pastel colours from dye stock. I could fit eight coffee jars in my big stock pot, so what the heck – do all eight!

Making up the stock was easy-peasy. I *love* acid dyes! Mixing the pastels from the stock was a little time-consuming but otherwise a simple job. All the  jars loaded with pre-soaked roving and dye go into the stock pot, water added to the stock pot up to the level in the jars. Pop in the thermometer, light the gas and we’re away.

Eight jars a simmering

After last weeks final success the smartest thing to do was follow the same successful procedure. The temperature in the Dye Room was no better than last week, and heating the stock pot to just below simmering took a while even with the lid on the pot. Then the room temperature vinegar was added to the jars, and 30 minutes of occasional pot-water stirring later, the heat was turned off and the pot was left till the next morning.

Sunday Morning

First task – bring the stock pot up to the house and gently wash the roving in cold water – the whole pot and contents were quite cold by now. As expected, the roving did not felt at all. The colours looked wonderful even while still wet!

Wet roving and wash water.

The most amazing thing is the dye jar water remaining had virtually no colour left in it, and no colour came out of the roving when it was washed. In this photo, the water in the tub is a combination of the roving rinse water, and the dye water from the jars. The roving is still wet, but the water dripping off it is clear. For those of us coming from an MX dye background, even natural dyes, with cotton and silks, this is simply amazing!

Although the lesson notes called for solid pastels in the first exercise, I’m far more interested in mottled colours. Apart from an initial stir and poke to get the dye colour through the roving in the jar, the jars were not stirred during the process. The roving came out mottled and I love it!

On to the rest of the lesson.

Eight jars in the pot again.

The remaining parts 2 and 3 of Lesson 2 were basically the same as last week, just using the pre-mixed stock dye instead of mixing powder. I decided to try gradations of brown for the 2nd exercise, and variations on purple, blue-purple, purple and red-purple, for the 3rd exercise – 3 colour ways.

Exercise 4 was mottling, which I’d already done albeit slightly differently. So I decided to experiment with two colours inspired by the spectrum from exercise 1. Colours I felt were “missing” – an apple green and gold – by adjusting the ratio of stock colours.

Dyeing multiple colours in jars in the stock pot was working well so we stuck with that method.

Sunday was even colder than Saturday, and the pot element only made a small difference to the dye room temperature – took it from a chilly 10.2C to 12.3C over the hour of warm-up and simmering.

The jars with the (chop)sticks in them were the gradations and 3 colour ways. They got an occasional poke and stir when the pot water was stirred. The pot water was stirred fairly frequently to ensure no hot-spots developed and the heat was spread as evenly as possible around the jars.The orange and green jars at the back were the mottling samples. No stirring, no poking, just soaked roving squished into the jar, and dye poured over the top.

Again, at the end of the 30 minutes pre-simmering, the element was turned off, and the pot left with the lid on to cool down. Sunday evening the pot was brought up to the house and the roving washed and hung to dry.

Saturday's roving (top)
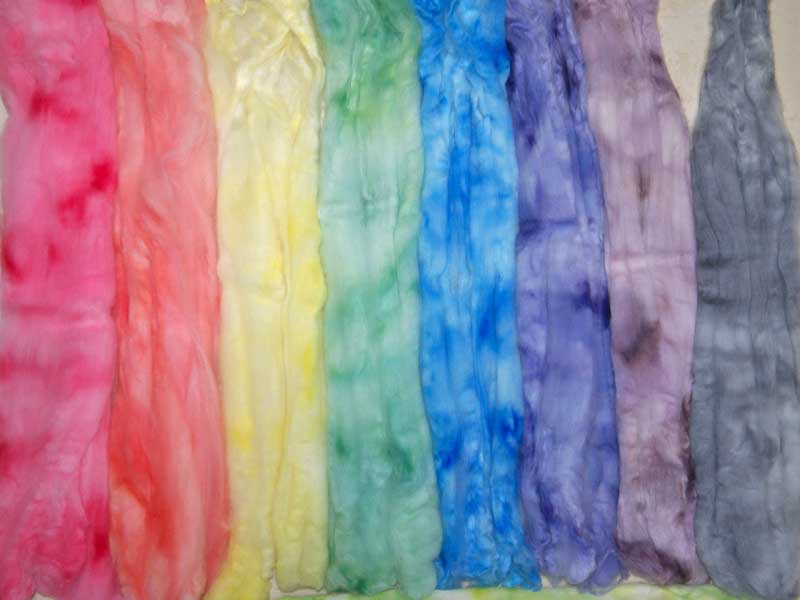
, and Sunday (bottom), hanging to air dry.

The results with mottling pieces were interesting, with quite a lot of white un-dyed wool. As per the lesson instructions these jars were not stirred, and the dye and vinegar was simply poured over the soaked roving. In the first exercise I had added 1 cup of water to the jars, soaked the roving in this water *in* the jars, added the dye and poked it around to make sure it penetrated the roving and I could see no white spots left before placing the jars in the pot.

The brown gradations resulted in 3 shades of a lovely peaty brown colour. I was particularly pleased with the purples – from blue-purple, purple and red-purple.

In summary, a particularly pleasing result, with some interesting observations.

More to come yet in Week 3.

Lesson 2 - exercise 1(top), 2(botom left), 3(bottom right), and 4(middle).

Dyeing Wool

3 colour way merino roving.

As a designer and mixed-media artist, I relish the opportunity to learn something new, and this week marked the start of my Wool Dyeing course run on-line by Marjie McWilliams through Quilt University.

I had purchased some wonderful 19.5 micron Australian merino wool roving in late 2009 with the intention of either felting or dyeing it. This seemed like the ideal opportunity to put it to use.

The Dye Room

My “Dye Studio” as I loosely call it is a small room attached to my aviary complex. The room is used on a daily basis for aviary maintenance, cleaning food containers and storing all manner of useful things. It has a great, long, multipurpose workbench, a sink with running cold water and lots of storage space. Since my Batik It! class with Marjie in June of 2009 it also has a small LPG stove running off bottled gas. Great for melting bees wax and stewing natural dyes.

The beauty of using this space as my Dyeing room is that I can mix, paint and splash dye around to my hearts content without making a mess in the house. The workbench is covered in plastic, the sink bench is all tile and porcelain, the floor is tile and concrete or tough 2nd hand laminated “timber” flooring. It doesn’t matter if I spill, as it cleans up easily, although it doesn’t really matter if it stained, it would just add “character” to the room.

Day 1, the first Lesson part 1

Armed with Acid Dyes in the basic colours (red, yellow, blue and black), wool roving and lesson instructions I launched into an afternoon of simmering dye with enthusiasm.

I’d worked previously with wool before – a Felting workshop in Corowa and Needlefelting / Whisper Felting course also through Quilt Universtiy. I’d previously dyed cotton, silk, myself and assorted other fabrics and objects with chemically reactive Procion dyes and natural dyes. This was my first attempt at dyeing wool roving and my first serious occasion to use Acid Dyes.

The Acid Dyes we use come in powdered form, and as is Marjie’s way of teaching, we learn to mix our own colours. I found the Acid Dyes strange to mix at first. Cold water instead of the warm water I was used to with Procion Dyes, and unlike Procion Dyes which dissolve reasonably easily, the Acid Dyes behaved more like cornflour – going through a curious semi-gel stage before dissolving in additional cold water.

Roving and orange dye.

Getting the dye pot up to and stable at optimum temperature appeared as the first challenge. Just under simmering point eh? Not as easy as it sounds. LPG burns hotter than town gas. The little trivets on my 2nd hand stove top weren’t high enough to keep the pot under the simmer point, which at our altitude (approx 1000′) was happening at somewhere under 180F in the small dye pot. I found I had to keep lifting the pot off the heat to let it cool down. Things were not going too well.

Felted roving.
Felted roving.

Still, at the end of the 30 minutes the roving has taken on a wonderful orange colour from the Dye, and was ready for it’s cool down process. “Gradually” the instructions say. I’ve deliberately felted wool before so I know rapid temperature changes will turn roving into felt. So quickly move the wool from the hot pot to a bucket of hot water … but it doesn’t feel right. It’s felted already 🙁

Back to the class discussion room to ask for help.

Day 2, first Lesson reprise

Heat Spreader
Heat Spreader

Knowing from Day 1 we had a problem keeping the heat down, we’d managed to find a piece of rusty steel plate to use as a “heat spreader”. This worked quite well sitting on top of the trivets, keeping the pot further away from the flame. The dye pot wanted to start simmering at 165F, so that became our target. This time I had a lovely sunflower yellow piece of roving that looked really good, that is “un-felted”, in the dye pot.

Felted again!
Felted again!

BUT the process of moving it from the hot dye pot to the hot-but-not-as-hot-as-the-pot water bucket, no more than a second or two, was enough to send the roving into shock and it felted! Again!

Ok, challenge number 2 – cooling the roving without it felting. The ambient temperature in the Dye Room was 12.5C (55F), ok, pretty cold. Well, it IS the middle of winter here.

The Options

The first thoughts to come to mind was either adding slightly cooler water to the dye pot, or immersing the whole pot in the hot water bucket, then progressively cool the bucket. Neither likely to be terribly practical with parts 2 and 3 of Lesson 1 which involved gradation dyeing and 3 colour ways with 3 separate jars per roving piece each.

One of the articles Marjie had directed me to from her blog included a comment about leaving the brew for over 3 hours, and that it did not seem to change the dye colour much. Ok, why not leave the roving in the dye pot to cool?

Success!!!

A pot full of dyes.
A pot full of dyes.

Lesson 1 take 3 was a marathon effort – all 3 parts of lesson 1 in my big stockpot at the same time! A solid orange dye/roving; a gradation in shades of green; and 3 colour ways! Each colour had it’s own jar, and the pot itself was filled with water to the highest point I could without the jars trying to float or tip.

Simmering dye pot, lid "on".

The temperature was fairly easy to manage, and got up to nearly 180F without boiling the pot water. I was concerned about the exposed roving between the jars getting chilled so I kept the lid mostly on the pot, only taking it off to check the temperatures, stir the pot water and spoon (used a 1/2 inch paintbrush actually) the dyes over the exposed wool from time to time.

The orange 3rd attempt at Lesson 1 part 1 did not get much of a stir as I already had two good solid (if felted) colours and wanted to see what not stirring would result in. A little mottling but good colour take-up over all.

Felted and unfelted roving
Felted and unfelted - the same amount of roving in each!

It took about 7hrs for the big pot to cool to nearly ambient, but it was WONDERFUL to finally see my Australian 19.5 micron merino roving come out of the wash buckets unfelted!!

Now it’s dry it is just so wonderfully vibrant, soft and warm to the touch.

Great result even if it took a while to get there! Looking forward to Lesson 2 next weekend!


Lesson 1 completed - sucessfully!