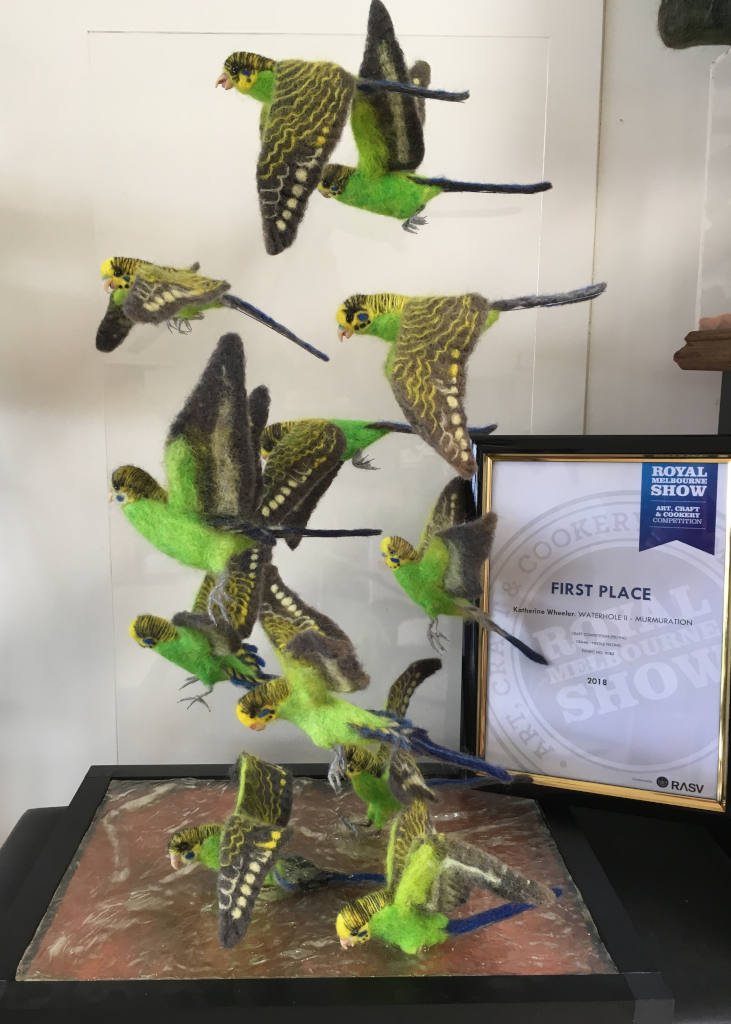
PLEASE NOTE: This is not a polished tutorial, simply a documentation of notes, reference photos, templates and diagrams used during the creation of The Waterhole II – Budgie Murmuration, Exhibition piece and prize winner at both the Bendigo Australian Sheep & Wool Show 2018, and the Royal Melbourne Show 2018.
This is based on wild budgies with a published length head to tail of 18cm. For a domesticated budgie increase measurements by at least 20% or use your own cute bird as a model
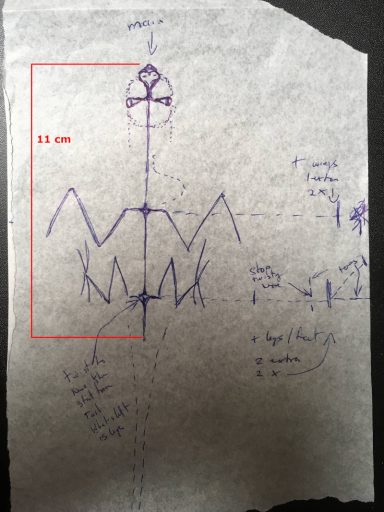
Wireframe Armature
The armature is made from copper wire (can be bought from Jaycar) to the pattern below:
Measure with a piece of string or yarn down one side of the diagram (omit the wings if you don’t want poseable ones). Optionally make the tail (wire) longer to strengthen the tail and prevent it drooping (or add a separate wire later). Double over your piece of string and cut so you have a length twice as long. This is your copper wire length template. Cut your wire, fold it in half, and that middle loop is your beak anchor point.
If you don’t want to use poseable wings you can just skip them (makes it way easier). I don’t have templates for closed budgie wings but your own bird will give you what you need there.
If you want wings, add in one (1) separate piece of wire across the shoulders the full width of the wingspan for extra strength before twisting.
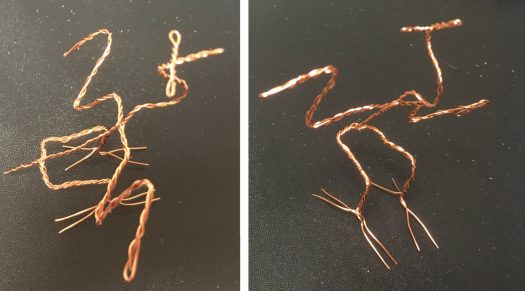
With the legs/feet, add two (2) extra pieces of wire all the way across at the hips so the ends can be used as the toes. Do NOT cut the main loop until the legs are at least part twisted so they can’t get away and cause mischief! The finished armature should look something like this:
Twisted copper wire makes good attachment points for polymer clay beaks and eyes, and is easier to wrap with wool than a smooth single wire.
Sorry no pics of the polymer clay sculpting process. Will try to remember next time.
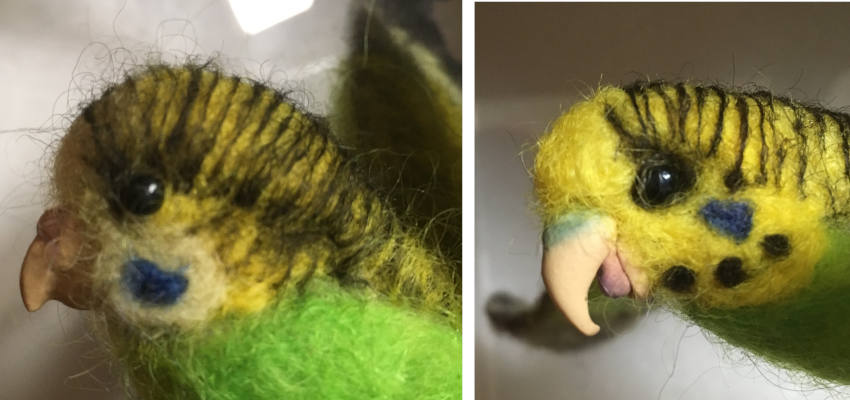
Beaks and eyes can be sculpted from polymer clay (I like Sculpy but there are a lot of alternatives available now) pressed into the wire armature at the appropriate points, and cured/dried in an oven or a small benchtop convection oven to harden. My preference is to use a base colour of clay that closely matches the desired finished colour, and add any extra colour before baking by brushing on powdered pastels. The cere (and tongue) for the budgies was coloured with powdered pastels and once baked results in a nice permanent colour. Eyes can be any colour clay and after baking (and cooling) they can be painted with black nail polish for a realistic shiny look. Toenails can also be coloured with suitably coloured nail polish or paint and from experience it’s better to do that before the fleece goes on!
Wrap the wireframe
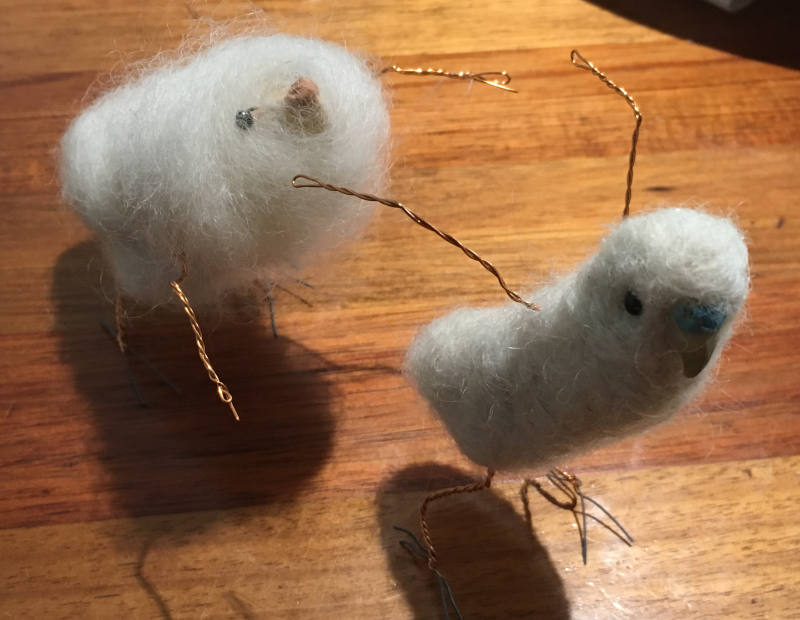
Now you are ready to start wrapping your armature with wool. For the inner layer I use scoured, carded and undyed English Leicester. Any fleece that will needlefelt will work. Wrap it fairly firmly in figure eights around the legs, wings, neck eyes and beak, then needle it to shape.
Back – loosely wrapped with wool. Front – once needled. At this stage the form does not need to be too tightly needled as it will be poked at a lot more as the colour is added over the top. As long as you have the rough shape you want at this stage that’s all you need.
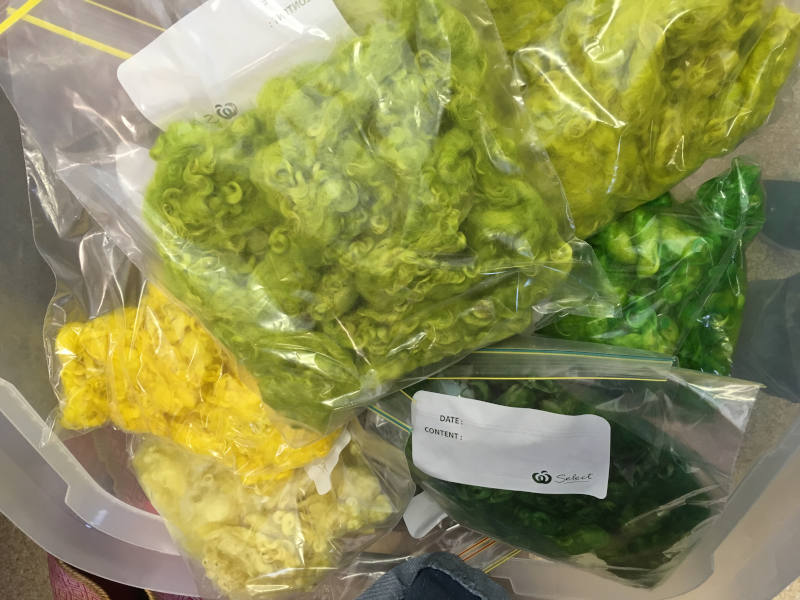
At this stage, if you haven’t already done so, you will need to collect or dye your fleece.
Again I prefer to use English Leicester as a) I breed them so I have plenty of their fleece 🙂 and b) the inherent lustre of English Leicester survives the needlefelting process, which many other breeds do not, to give your finished birds the appearance of a healthy sheen.
I do not have any photos of this stage, but here is a quick photo from a finished budgie. Having a flexible wire core the feet are very poseable.
Legs are best done before the body colour goes on so the ends can be securely anchored to the body and hidden by the top body feather colour. Select your leg coloured fleece and draw it out as you would if spinning it, and wrap it securely around the ankle working down and back one toe at a time.
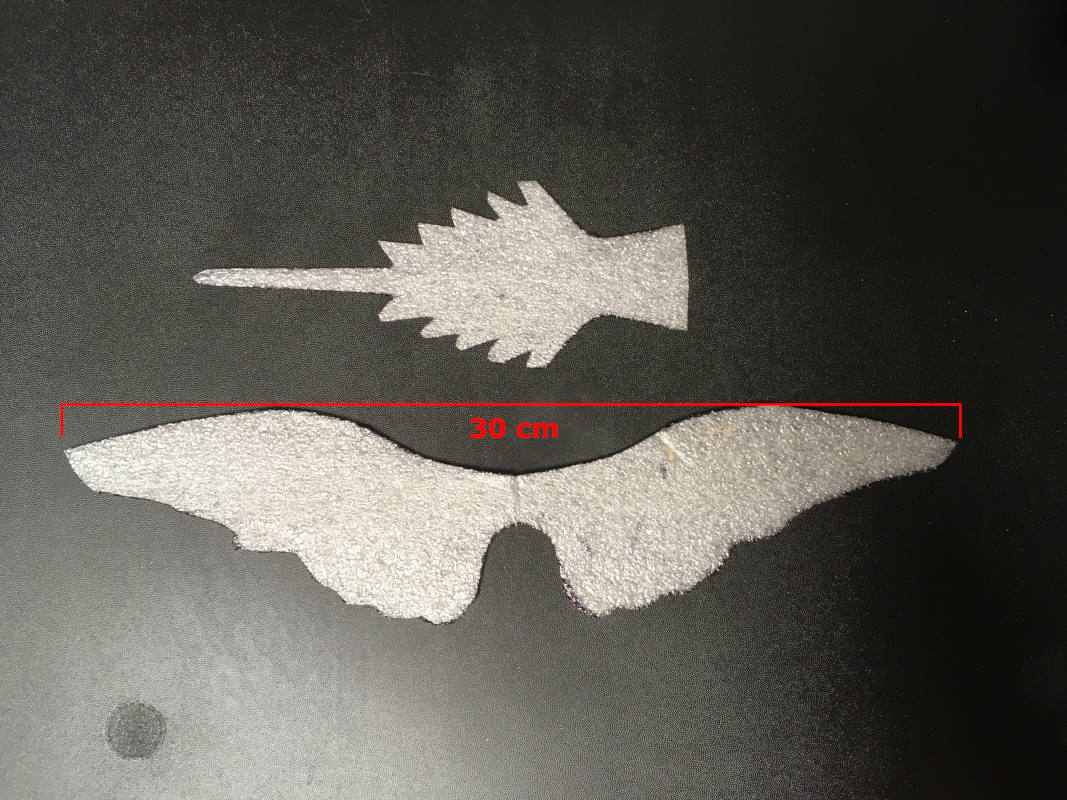
Wings (optional) and Tail
Wings can be made separately in their finished colours and needlefelted to the body. If you want flying wings the template is below. The two wings are made in one piece to give a convenient and strong area to attach the wings to the body. Closed wings are also arguably easier to make and detail separately, then attach to the body later. You could use the template below as a rough guide.
Templates for wings and tail:
Tail detail includes maneuvering tail feathers in their open position. Budgies can open and close these tail feathers at will. For a closed tail simply smooth out the line between the mail long tail feathers and the body. Closed wings on birds bend at roughly the mid way point from the body (their modified “wrists” if you look at the skeletal structure) with the primary flight feathers making up over a third of the overall wing length. For closed wings you could make a teardrop shape based on the wrist to tip part of the template above.
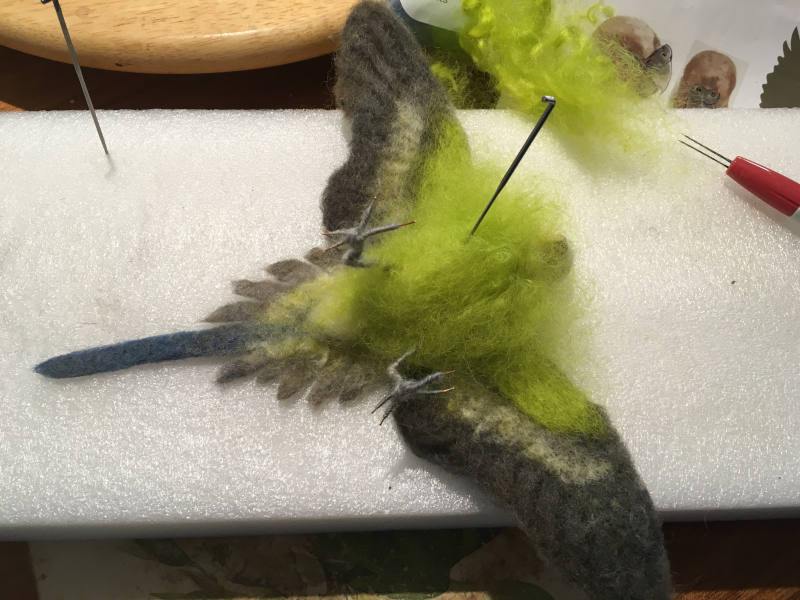
I usually needlefelt flat components lightly on a piece of foam with the minimum of base colours, then wet felt (more like pre-felt) and iron carefully, dry completely and needlefelt extra colour and detail over the top.
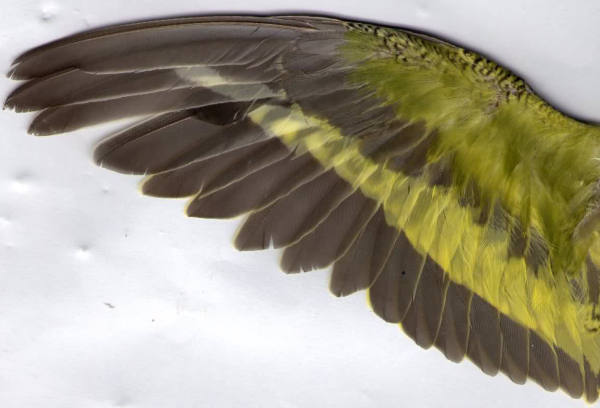
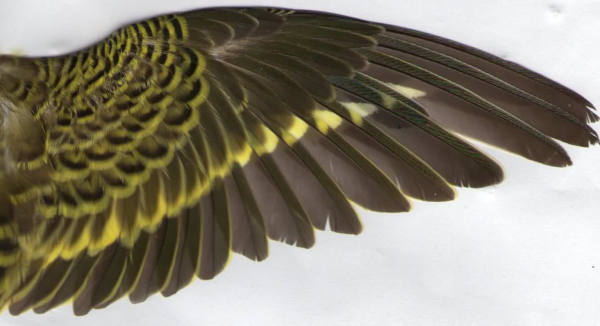
Actual wing: underneath.Actual wing – upper.
Detail reference photos for wing markings were sourced from the internet and one of my own slightly reluctant “models”.
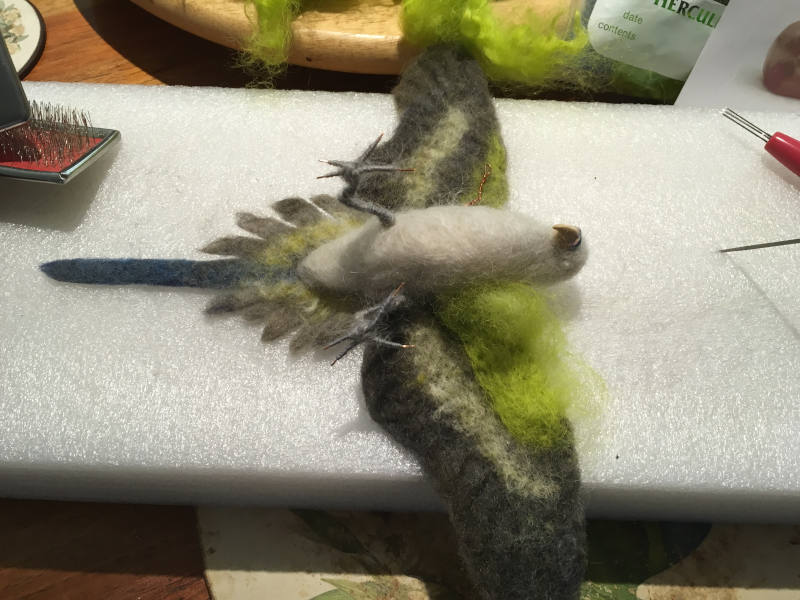
At this stage the wings and tail can be attached to the body:
Needle the wings and tail to the back of the bird’s body, then turn it over and needle extra appropriately coloured fleece to secure the wings to the wire and hide the wire. Needle the coloured fleece at the body as well to help stabilise the wings. This was the first of the budgies from “Murmuration” – it’s eyes and toenails were not painted before applying wool – big mistake! All later birds had their toes and eyes done first.
Once the wings are secure start colouring the body starting at the tail to make sure it is also well secured top and bottom.
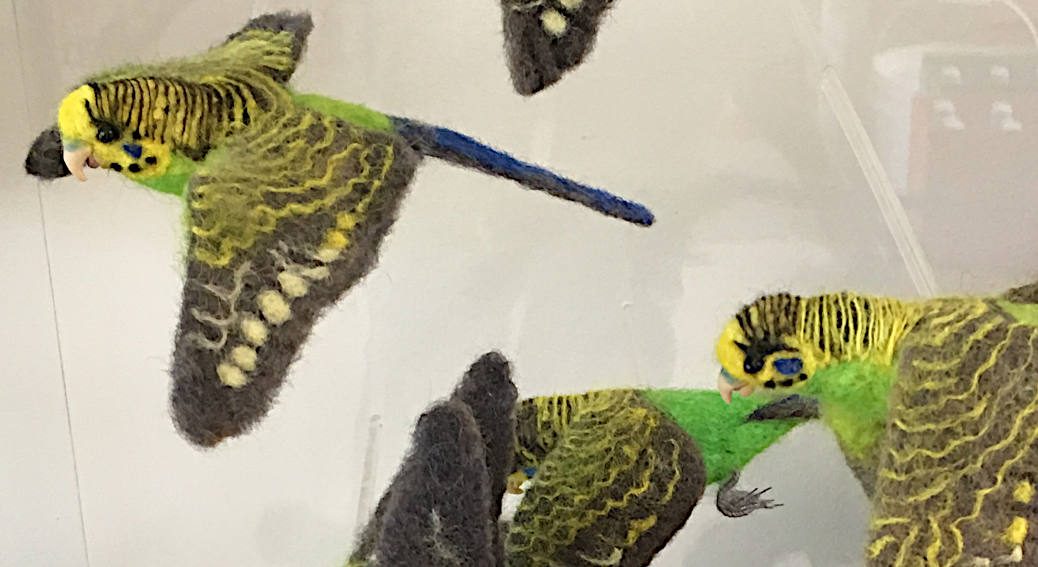
Continue adding the top coloured fleece as appropriate for your budgie. Choose a base colour to match your bird’s most dominant colour, and add any secondary markings over the top in an appropriate colour. For wild budgies I usually but not always (I kept changing my mind) do the back up as far as the crown in dark colours with yellow markings needled over the top, and the forehead and cheeks in yellow with black and blue markings as appropriate. Cheek feathers needled flat then added to give a more 3D realistic feathery around the beak look. Add in the blue cheek patches and black spot markings (if your budgie has them) last.
Enjoy your new little friend. He or she does not need feeding, will not poop on your furniture , eat your plants or nibble on any paper it finds. And it will not fly away.
But it won’t talk to you either, or amuse you with endless little antics or greet you with excited chatter. So don’t forget your “real” budgie – as if he or she would every let you 🙂 !

 Again I prefer to use English Leicester as a) I breed them so I have plenty of their fleece 🙂 and b) the inherent lustre of English Leicester survives the needlefelting process, which many other breeds do not, to give your finished birds the appearance of a healthy sheen.